 how-to
How to Design Custom Wood Home Accessories
Table of Contents
- Understanding Your Vision for Custom Wood Home Accessories
- Selecting the Best Wood for DIY Home Decor
- Essential Woodworking Tools for Beginners
- Creating Your Design: From Sketch to Digital Plan
- Wood Finishing Techniques for Home Decor
- Personalization Techniques: Engraving, Painting, and Carving
- DIY vs. Professional Craftsmanship: What to Consider
- Conclusion
Last Updated: August 7, 2026
Understanding Your Vision for Custom Wood Home Accessories
The first step in designing custom wood home accessories is clarity about what you actually want, not just aesthetically, but functionally. What will this piece do, where will it live, and how will your daily life improve because it exists? At Pinnacle Woodcraft, LLC, we've found that the best custom wood home accessories start with a clear vision, not a vague feeling. That vision needs to answer three things: your style preference, the functional purpose, and how it integrates with your existing space.
Define Your Style and Purpose
Your style is about how you want to feel when you see and use your piece. Are you drawn to rustic charm with visible wood grain and natural finishes? Modern minimalism with clean lines? Boho chic with organic shapes? Each approach requires different wood species, finishing techniques, and design elements.
Purpose matters equally. A charcuterie board needs different dimensions and surface treatment than a decorative wall shelf. A valet tray demands precision in joinery and a smooth, protective finish. A pet feeding station requires durability and easy cleaning. Write down exactly what this piece needs to do before you sketch anything. This clarity prevents costly mistakes and filters out options that won't work.
Gather Inspiration and Reference Images
Collect images of pieces you genuinely like. Look for patterns in what appeals to you. Do you consistently choose warm honey tones or cool grays? Are you drawn to smooth, modern silhouettes or textured, handcrafted details?
Create a reference folder with at least 8-10 images, including close-ups of wood grain, finishes, and joinery details. These specifics matter more than overall composition. Pay attention to scale and proportion in your references, and note dimensions when possible to ensure your custom wood home accessories will fit your actual space.
Selecting the Best Wood for DIY Home Decor
Wood selection determines durability, appearance, workability, and cost. The wrong choice makes the entire project harder; the right choice makes craftsmanship easier and the piece lasts decades.
Hardwoods vs. Softwoods for Your Project
Hardwoods like oak, walnut, cherry, and maple are denser, more durable, and take finishes beautifully. Walnut offers rich chocolate tones. Cherry develops warm reddish hues over time. Maple is pale and stable, ideal for precision pieces. Hardwoods resist denting and wear, making them ideal for pieces that see regular use. The trade-off: they're harder to work with and require sharper tools and more finishing time.
Softwoods like pine, cedar, and fir are easier to cut and shape. Pine is affordable and workable for DIY projects. Cedar resists decay naturally. The drawback: softwoods dent easily and show wear quickly. They're better suited to decorative pieces or first projects where character marks add to the aesthetic.
For custom wood home decor that needs to last, hardwoods justify the extra effort. For decorative-only pieces, softwoods let you learn without fighting the material.
Reclaimed and Sustainable Wood Options
Reclaimed wood carries history and character no new wood can replicate. Barn wood and salvaged beams have deeper color and more pronounced grain. However, reclaimed wood comes with challenges: hidden nails, varying thickness, and unpredictable grain patterns. It works beautifully for rustic pieces but is less ideal for projects requiring precision.
Sustainable options matter if environmental impact influences your decisions. FSC-certified hardwoods come from responsibly managed forests and cost slightly more but guarantee your project supports better forestry practices.
For most custom wood home accessories, combine reclaimed wood for visual appeal in pieces where variation adds value with FSC-certified hardwoods for functional pieces requiring consistency and durability.
Essential Woodworking Tools for Beginners
You don't need a full workshop to create quality custom wood home accessories. You need the right tools for your specific project.
Measuring, Marking, and Layout Tools
Precision starts with accurate measuring. A quality measuring tape (25-foot minimum), combination square, and sharp pencil are essential. A marking gauge creates consistent lines parallel to edges. Many beginners skip proper marking and pay the price in misaligned joints. Taking five minutes to mark carefully saves an hour of fixing mistakes.
Cutting and Shaping Tools
For hand tools, a quality handsaw handles straight cuts, a coping saw cuts curves, and a chisel set (1/4", 1/2", 3/4", 1") handles detail work. A block plane smooths surfaces and edges.
If using power tools, a circular saw handles straight cuts efficiently, a jigsaw cuts curves, and a random orbital sander creates smooth finishes. Start with one or two essential power tools rather than the whole arsenal.
Safety Gear and Workshop Basics
Safety isn't optional. Safety glasses, dust masks, work gloves, and hearing protection are essential. Proper lighting prevents mistakes. A sturdy workbench and clamps provide stable surfaces and free both hands. Proper ventilation matters when finishing, and a fire extinguisher belongs in any workshop using flammable finishes.
Creating Your Design: From Sketch to Digital Plan
Moving from vision to actual dimensions requires translating ideas into workable plans.
Hand Sketching Your Initial Concept
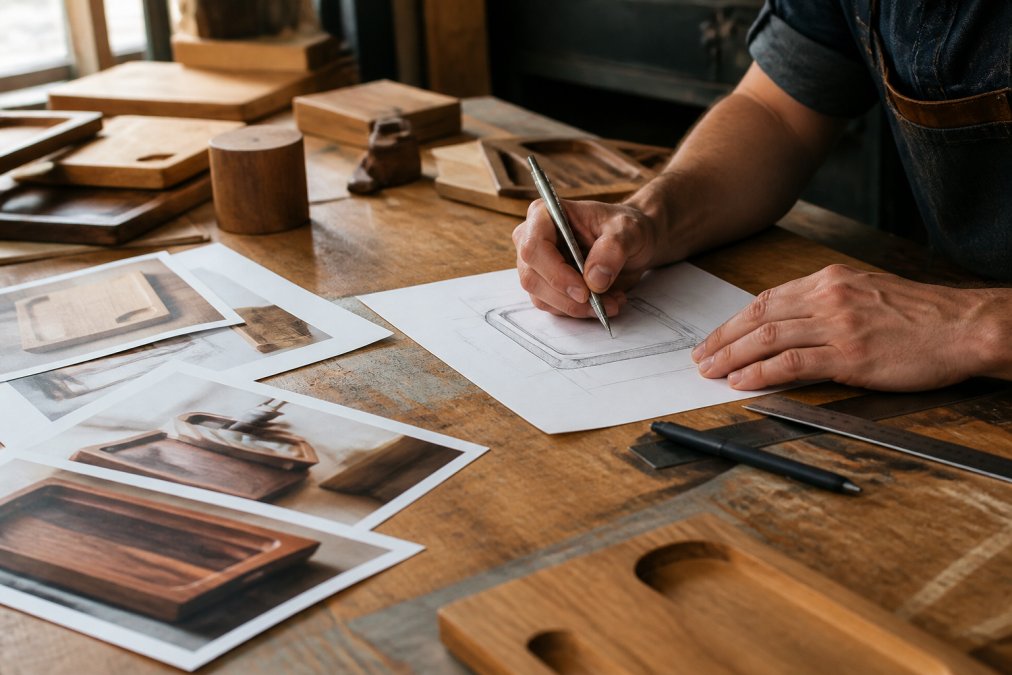
Start with pencil and paper. Sketch your custom wood home accessories from multiple angles: front, side, top view. Include rough dimensions, note where joints will be, and indicate where decorative elements will go. Hand sketching forces you to think through details your mind might skip and prevents redesign later.
Email your idea and a few details to MichaelH@pinnaclewoodcraft.net →
Using Digital Design Tools for Precision
Digital tools turn sketches into precise measurements. Free options like Google SketchUp or Fusion 360 let you create 3D models. Start with a simple 2D drawing showing top and side views with exact measurements and a cutting list. Digital tools also let you visualize how your custom wood home accessories will look with different stain colors or finishes before committing to wood.
Wood Finishing Techniques for Home Decor
Finishing transforms raw wood into a piece that's both beautiful and protected. Poor finishing ruins good craftsmanship; excellent finishing makes good work exceptional.
Sanding and Surface Preparation
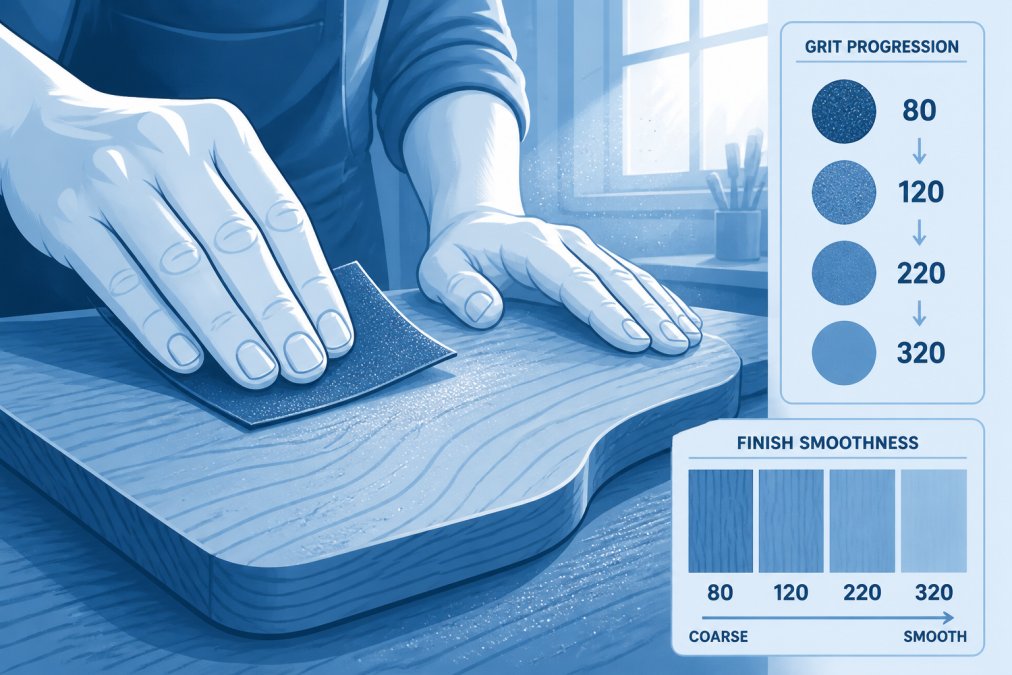
Start with coarse grit (80-120) to remove saw marks. Progress to medium grit (150-180) to smooth the surface. Finish with fine grit (220-240) for a silk-smooth surface. Sand with the grain, not against it. After sanding, remove all dust with a tack cloth, dust under finish creates a rough surface that catches light poorly.
Stain Finishes and Natural Aesthetics
Test stain on scrap wood from your project before applying it to the actual piece. Water-based stains dry quickly and are low-odor. Oil-based stains penetrate deeper and create richer color. Apply stain in thin coats with a brush or cloth, working with the grain. Multiple thin coats build color better than one heavy coat.
Natural finishes highlight wood grain without darkening the wood, working beautifully for pieces where the wood species itself is the aesthetic.
Sealing for Protection and Longevity
Polyurethane creates a hard, durable surface. Water-based polyurethane is low-odor and dries quickly. Oil-based polyurethane is more durable but yellows slightly. For pieces that see regular use, seal with at least two coats.
Natural oil finishes (tung oil, linseed oil) enhance wood appearance without creating a plastic-looking surface and are easier to repair. The trade-off: they're less protective and require periodic reapplication. For custom wood home accessories that will be used and handled, polyurethane offers better protection.
Personalization Techniques: Engraving, Painting, and Carving
Personalization transforms a nice piece into something irreplaceable. Engraving creates permanent marks by removing surface wood. Hand engraving requires steady hands and sharp tools but produces character that machinery can't replicate.
Painting adds color and graphic elements. Acrylic paint works on wood with proper surface preparation. Seal painted surfaces with clear polyurethane to protect the design.
Carving creates three-dimensional detail. Relief carving adds visual interest; chip carving works on flat surfaces. The best personalization complements your design rather than competing with it.
DIY vs. Professional Craftsmanship: What to Consider
DIY projects teach you skills, save money on simple pieces, and give you satisfaction from creating something with your hands. Professional craftsmanship delivers consistency, handles complex designs, and produces heirloom-quality pieces.
DIY works for straightforward projects like simple boxes, basic shelves, and functional serving pieces. It doesn't work well for complex joinery, pieces requiring specialized tools, or projects with tight deadlines.
Professional woodworkers like those at Pinnacle Woodcraft, LLC handle projects where precision, durability, and aesthetics all matter equally. The decision comes down to your skills, available time, tools, and how much the final quality matters. Many people find the middle ground: start with DIY on simple projects to learn techniques, then commission professional work for pieces that truly matter.
Designing custom wood home accessories requires clear vision, appropriate tools, and finishing techniques that protect your work. Whether you tackle the project yourself or work with experienced craftspeople, the process starts with understanding what you want and why. If your vision exceeds your current skills or timeline, consider reaching out to Pinnacle Woodcraft, LLC. We specialize in turning your ideas into one-of-a-kind pieces built with carefully selected lumber, solid joinery, and hand-sanded finishes. Email your idea to MichaelH@pinnaclewoodcraft.net to discuss your custom wood home accessories project.
| Design Element | DIY Approach | Professional Approach |
|---|---|---|
| Simple boxes or shelves | Manageable with basic tools | Faster, more refined results |
| Complex joinery | Difficult, requires practice | Precise, reliable execution |
| Custom dimensions | Flexible, adapts to your space | Exact specifications guaranteed |
| Specialty wood species | Limited availability, harder to work | Full access to premium materials |
| Timeline flexibility | Months of learning and work | Fixed delivery date |
| Personalization techniques | Hand methods, unique character | Professional engraving and carving |
| Cost | Lower material cost, your time | Higher upfront cost, zero waste |
| Final quality consistency | Improves with practice | Guaranteed quality every time |
Frequently Asked Questions
What are the best types of wood for custom home accessories?
Hardwoods like oak, walnut, and maple offer durability and beautiful wood grain patterns ideal for visible decor pieces. Softwoods such as pine work well for painted finishes. For rustic aesthetics, reclaimed wood adds character and sustainability. Consider the piece's function, cutting boards need food-safe woods, while decorative items can prioritize appearance. Your design's style and the accessory's intended use should guide your wood species selection.
How long does it take to design and build a custom wood home accessory?
Timeline depends on complexity, wood type, and finishing details. Simple items like small trays or shelves may take 2-4 weeks, while intricate pieces with custom joinery, engraving, or multiple finish coats can require 4-8 weeks. If you need a piece for a specific date, discuss your timeline early, rush orders are possible but may affect availability. Professional makers like Pinnacle Woodcraft can discuss your deadline when you share your initial concept.
What finishing techniques create a professional look for custom wood decor?
Start with thorough sanding using progressive grits (80, 120, 180, 220) to achieve a smooth surface that accepts stain evenly. Apply wood stain for color and character, allowing proper drying time between coats. Seal with polyurethane, water-based finishes, or wood oils depending on your aesthetic, matte finishes suit minimalist styles while satin enhances wood grain. Multiple thin coats applied with proper drying time produce better results than single thick applications.
Do I need special tools to design custom wood home accessories, or can I start with basic equipment?
You can start with basic hand tools: a good measuring tape, square, pencil, handsaw or circular saw, chisel set, sandpaper, and clamps. Safety gear, eye protection, dust mask, and hearing protection, is essential. As you advance, power tools like a miter saw or orbital sander speed up work. For design, sketch on paper or use free software like SketchUp to plan dimensions and joinery before cutting. Start simple and invest in quality tools as your skills develop.
This article was written using GrandRanker